# 1、注解注入
首先,需要在对应类上添加@Component 注解,然后在对应使用字段上添加@Autowired注解
import org.springframework.stereotype.Component;

@Component
public class UserService {
    private UserRepository userRepository;
}

import org.springframework.beans.factory.annotation.Autowired;

public class UserService {
    @Autowired
    private UserRepository userRepository;
}
1
2
3
4
5
6
7
8
9
10
11
12
13
14
2
3
4
5
6
7
8
9
10
11
12
13
14
**优点:**代码简洁、易于理解。
**缺点:**如果需要更改注入的方式,可能需要更改多个地方。
# 2、构造器注入
public class UserService {
    private UserRepository userRepository;

    public UserService(UserRepository userRepository) {
        this.userRepository = userRepository;
    }
}
1
2
3
4
5
6
7
2
3
4
5
6
7
在构造器注入中,依赖关系通过类的构造函数传递。这意味着在创建对象时,依赖的对象实例会作为构造函数的参数传递进来。这表达了两个对象间的一种强的依赖关系,即组合关系。但是构造器注入不能部分注入,因为调用构造方法如果传入所有的参数就会报错。
# 3、Setter注入
public class UserService {
    private UserRepository userRepository;

    public void setUserRepository(UserRepository userRepository) {
        this.userRepository = userRepository;
    }
}
1
2
3
4
5
6
7
8
2
3
4
5
6
7
8
优点:灵活性较高,可以根据需要选择注入方式。
缺点:可能导致代码冗余,不易于维护。
在Setter方法注入中,依赖关系通过类的setter方法传递。这表达了两个对象间较弱的依赖关系,即聚合关系。Setter方法注入的优点在于可以部分注入,即只需要为部分属性进行注入即可。
# 4、Lombok中的@RequiredArgsConstructor注入
@RequiredArgsConstructor
public class VerifyController {

    private final VerifyService verifyService;

    private final InvitationService invitationService;

    private final VerificationCodeService verificationCodeService;
}
1
2
3
4
5
6
7
8
9
10
2
3
4
5
6
7
8
9
10
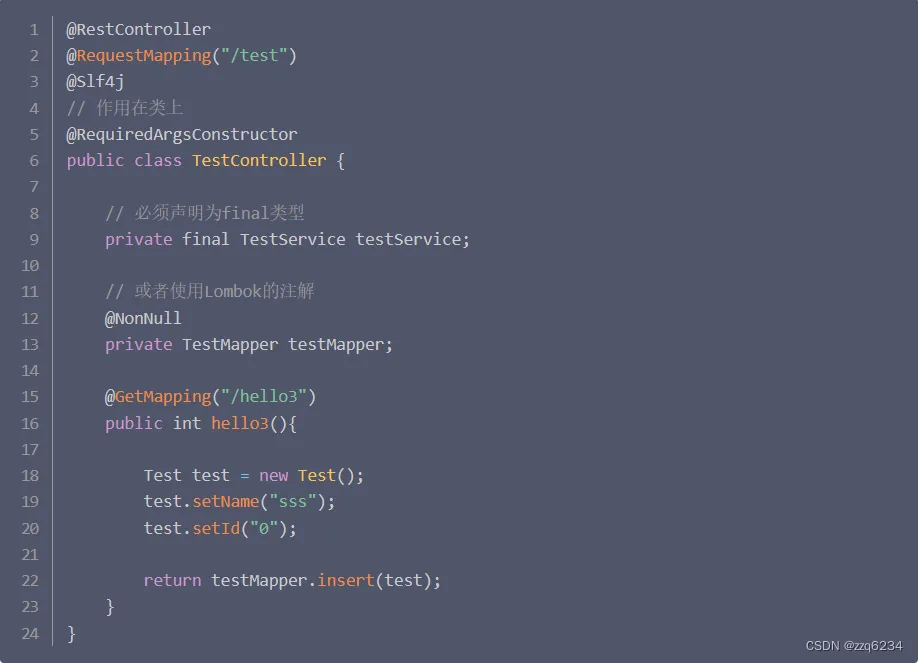
# 详解@RequiredArgsConstructor 注解的使用
在springboot项目中,controller或service层中需要注入多个mapper接口或者另外的service接口,这时候代码中就会有多个@AutoWired注解,使得代码看起来什么的混乱。
lombok提供了一个注解:
@RequiredArgsConstructor(onConstructor =@_(@Autowired))
写在类上面可以代替@AutoWired注解,需要注意的是:在注入的时候需要用final定义,或者使用@notnull注解,防止注入空对象或未初始化的对象,避免循环依赖。
